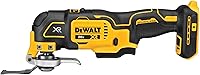
Makita XMT03Z Cordless Multi-Tool Review: Worth It? (November 2026)
The Makita XMT03Z suits existing Makita 18V LXT owners who want dial-controlled cutting, sanding and scraping. Buy it for close trimming and repair work, with compatible Star-symbol batteries; the battery, charger and task-specific accessories may require separate purchases.
On this page (9 sections)
- What does the Makita XMT03Z offer?
- Who should buy the Makita XMT03Z?
- What should you buy with the XMT03Z?
- How does the Makita compare with DeWalt and Milwaukee?
- Is the XMT03Z easy to hold and control?
- How should you set up the Makita XMT03Z?
- Which techniques help prevent damaged work?
- What mistakes and care problems should you avoid?
- Should you choose the Makita XMT03Z?
The Makita XMT03Z is a sensible choice for Makita 18V LXT battery owners who need close trim cuts, scraping and detail sanding. Buy it for controlled repair work where placing the blade matters more than making long cuts quickly.
Its dial-based speed control suits people who prefer to set a working speed before starting. If you want to vary speed through a trigger or change attachments often, compare the alternatives below before committing to a battery platform.
What does the Makita XMT03Z offer?
The XMT03Z offers adjustable speed, soft start and a lock-on slide switch for cutting and surface work. Its main appeal is adding these jobs to a compatible Makita cordless setup.
Makita XMT03Z Multi-Tool: Best for Makita battery owners

- 6,000–20,000 OPM variable speed
- 3.2° oscillation angle
- 2-3/8 in barrel grip
- Adapters fit most competing accessories
A dial-controlled cordless multi-tool for Makita battery owners doing trim cuts, scraping and detail sanding. It includes a plunge blade and accessory adapters, but the battery and charger are separate.
Pros
- Dial sets speed independently of the slide switch
- Adapters fit most competing accessories
- Large slide switch has a lock-on button
- Soft start helps control startup
Cons
- Battery and charger are sold separately
- Sanding and grout-removal accessories require separate purchases
The dial covers 6,000–20,000 oscillations per minute, or OPM. That number describes the attachment's side-to-side motion, not a spinning blade, and the 3.2° oscillation angle is designed for aggressive cutting and sanding.
A dial separates speed selection from switching the tool on. This suits a planned cut or sanding pass where you want to establish a setting and keep working at it.
The lock-on control also means you need a deliberate stopping routine. Switch the tool off before setting it down, and let the attachment stop before moving your hands near it.
The XMT03Z is useful for small, awkward jobs, but it shouldn't be your only cutting tool. A saw designed for long cuts or bulk demolition will usually be the better match for those tasks.
Who should buy the Makita XMT03Z?
Buy the XMT03Z if you already have compatible batteries and regularly handle small repair tasks. Skip it if starting a new battery system would add several purchases for a single job.
Makita XMT03Z buyers who benefit most
Existing Makita users have the clearest reason to choose it: their compatible battery and charger can serve another tool. Check for the required Star symbol rather than assuming every Makita battery fits.
Typical jobs include trimming a door casing for flooring, making a small cutout and scraping residue with suitable attachments. These tasks reward careful blade placement and access near an edge.
Dial control also suits people who prefer a set working speed. You can focus on guiding the attachment instead of holding a trigger at a chosen position.
When another tool makes more sense
Skip this purchase if your main project is cutting many boards to length or breaking down thick framing. An oscillating tool's short working stroke makes those jobs a poor reason to buy one.
For rough cutting and demolition, our reciprocating saw vs oscillating multi-tool guide explains which tool fits each job. Choose around the cuts you expect to repeat, rather than one awkward corner.
Also compare alternatives if you already use another battery platform. A control feature needs to solve a real problem to justify adding a separate charger and battery.
What should you buy with the XMT03Z?
You need a compatible battery, a charger and an attachment matched to your first job. The included cutting blade doesn't equip the tool for every task it supports.
The box contains a 1-1/4-inch bi-metal plunge blade and 2 multi-tool adapters. Sanding, scraping and grout removal call for suitable separate attachments.
Build a short accessory list around the work ahead:
- Wood trimming: choose a wood-cutting blade suited to the cut's width and depth.
- Possible fasteners: choose a blade approved for the metal you may encounter.
- Detail sanding: get a compatible pad and sheets in useful grit steps.
- Adhesive removal: match the scraper to both the residue and the surface beneath it.
- Grout removal: choose an accessory narrow enough to avoid the tile edges.
The adapters fit most competing accessories, but compatibility still needs checking for each attachment. A mount that looks similar isn't enough to confirm a secure fit.
Makita claims up to 20 minutes of runtime with its separately sold 18V LXT 3.0Ah battery. Plan charging breaks around the work rather than treating that figure as a fixed session length.
If you need the entire setup, compare the combined cost with a kit in a platform you already use. Include the first job's accessories so you're comparing usable setups.
How does the Makita compare with DeWalt and Milwaukee?
Choose between these tools by battery compatibility, control style and accessory changes. Maximum OPM alone doesn't settle the decision because the blade, material and feed pressure also affect the work.
DeWalt DCS356B: choose it for trigger control
The DeWalt combines a 3-speed selector with a Dual-Grip variable-speed trigger. It suits buyers who want to ease into a cut and change speed through finger pressure.
Its brushless motor, LED and wrench-free Quick-Change system make it a strong alternative for mixed repair work. Frequent moves between cutting and sanding give the accessory system a clear purpose.
Skip it if you're satisfied with dial control and already have the compatible Makita setup. Both tools require separate batteries and chargers, so switching platforms needs a practical reason.
The DeWalt DCS356B review explains its controls in more detail. For a focused comparison, read Makita vs DeWalt oscillating multi-tools.
Milwaukee 2626-20: choose it for M18 repair work
The Milwaukee M18 model suits existing M18 users who want to move between cutting and sanding. It includes a wood-cutting blade, sanding pad and assorted sheets.
Its 12 speed settings cover 11,000–18,000 OPM, with an LED, rubberized handle and all-metal gear case. Those features give it a clear role in varied maintenance work without requiring an M18 owner to adopt another platform.
Skip it if you need speed control below its stated range or prefer a variable-speed trigger. Don't dismiss it solely because its maximum OPM is lower than the Makita's.
Milwaukee 2526-20: choose it for an existing M12 setup
The M12 FUEL model suits M12 users who want dial control and tool-free blade changes. It has a brushless motor, LED and vibration dampening technology, plus a wood blade and sanding accessories.
It makes sense for maintenance tasks when the matching battery setup is already available. Skip it if you'd need to add M12 batteries solely for this tool while another compatible platform is already on your shelf.
Don't choose it by the voltage label alone. Consider the attachment, the job and how you prefer to control the tool.
Is the XMT03Z easy to hold and control?
The 2-3/8-inch barrel grip gives you a specific size to assess, but the work position matters as much as grip diameter. Check your reach to the switch while holding the tool as you would during a cut.
A grip that feels manageable at waist height may feel different under a cabinet or above a door. Consider the battery's position and whether you'll have room to support the tool without twisting your wrist.
Makita describes the XMT03Z as having reduced vibration and lower noise. Still use hearing protection, take breaks and avoid gripping harder than needed to guide it.
The accessory angle can help you approach an edge without forcing your wrist into an awkward position. Use only mounting positions allowed by the attachment and tool instructions.
How should you set up the Makita XMT03Z?
Start with the battery removed, the correct attachment and a clear cutting path. Secure setup matters more than choosing the highest speed.
- Inspect the work area. Locate wiring, pipes and other hidden services before cutting walls or floors.
- Match the attachment to the material. Check its mounting requirements and permitted uses.
- Fit it securely. Follow the tool and adapter instructions, keeping mounting surfaces clean.
- Secure the work. Clamp loose pieces and keep your supporting hand out of the blade's path.
- Prepare protection and lighting. Use eye and hearing protection, plus dust control suited to the material.
- Check the switch. Make sure it's off before inserting the battery.
Choose a blade that reaches the required depth without unnecessary projection behind the work. Excess reach can damage a hidden surface even when the front cut looks controlled.
For a flooring undercut, use a scrap of the flooring and underlayment as a height reference where appropriate. Keep the blade level rather than tipping it to force progress.
Our guide to how to use an oscillating multi-tool covers the broader workflow. Review the tool manual before the first job.
Which techniques help prevent damaged work?
Use light, steady pressure and an attachment suited to the material. Forcing the tool can build heat, spoil the surface and wear the accessory.
Make controlled plunge and flush cuts
Mark the cut clearly and begin with a shallow groove before advancing. Support the tool so the blade follows the mark instead of relying on pressure to hold it in line.
Pause to clear debris when needed, switching off and letting the attachment stop first. If progress slows sharply, check for a worn blade, trapped debris or the wrong blade material.
Keep sanding flat
Hold the sanding pad flat and move it across the surface. Pressing on one corner can leave a hollow or round an edge you wanted to keep square.
Use coarser paper only when material needs removing, then work toward a finer finish. Replace clogged or worn sheets instead of adding pressure.
Protect surfaces during scraping and grout removal
Begin scraping at a shallow angle to reduce the chance of gouging the base material. Some finishes can lift with the residue, so start in a less visible area.
For grout, keep the attachment centered in the joint and stop short of contacting tile edges. Narrow joints and corners need extra care because there is less room to correct the tool's path.
See oscillating multi-tool uses for more task examples. Choose the attachment for the actual material, not just the name of the project.
What mistakes and care problems should you avoid?
Avoid excess pressure, loose attachments and dirty mounting surfaces. These are practical checks whenever cutting slows or control feels worse.
Don't assume the highest speed is right for every attachment. Follow its instructions and adjust your approach if plastic softens, wood scorches or a sanding surface gets too hot.
Don't use a dull blade to finish “just one more cut.” Replace damaged or worn accessories, and let hot attachments cool before handling them.
After work, remove the battery and clear dust from the tool's exterior and ventilation openings according to the manual. Clean the accessory mount before storage so debris doesn't interfere with the next installation.
Store blades with their cutting edges protected and keep sanding sheets dry. Before the next job, inspect the attachment, adapter and mounting parts rather than assuming the previous setup is still secure.
Should you choose the Makita XMT03Z?
Choose the Makita XMT03Z for an existing compatible Makita setup and dial-controlled repair work. Before ordering, confirm the battery fit and choose the attachment for your first project.
Pick the DeWalt if trigger control and frequent accessory changes are priorities. Choose the Milwaukee model that matches your existing M18 or M12 setup when it meets your control and accessory needs.
If you haven't chosen a battery platform, start with our best cordless oscillating multi-tools. For options across power types, see the best oscillating multi-tools.
Frequently asked questions
Does the Makita XMT03Z include a battery and charger?
No, the Makita XMT03Z comes without a battery or charger and requires a compatible Makita 18V Lithium-Ion battery with a Star symbol. If you're starting a new cordless setup, account for both items and the accessories needed for your first job before choosing this tool.
What speed range does the Makita XMT03Z have?
The Makita XMT03Z runs from 6,000 to 20,000 oscillations per minute, with speed set by a dial. Choose a setting within the accessory's instructions, begin with a controlled approach to the material, and adjust if the cut burns, the sanding surface heats up or the attachment struggles.
Can the Makita XMT03Z use other brands' accessories?
Yes, the Makita XMT03Z includes adapters for most competing accessories, but you still need to confirm the exact attachment fits. Check its mounting pattern, any adapter requirement and its intended material before installation, then remove the battery and follow the mounting instructions for both the tool and attachment.
Is the Makita XMT03Z suitable for grout removal?
Yes, the Makita XMT03Z can remove grout with a suitable grout-removal accessory; its included plunge blade isn't the right attachment for that job. Choose an accessory that fits the joint without contacting the tile edges, and follow our guide to removing grout with an oscillating multi-tool for planning and technique.